Installing PostgreSQL for development and testing on Microsoft Windows
Prerequisites
- Windows 10 build 16299 or later
- An account with administrator rights
Installing
For a development machine, this example uses WinGet to download and install PostgreSQL:
winget install PostgreSQL.PostgreSQL.16
Found PostgreSQL 16 [PostgreSQL.PostgreSQL.16] Version 16.4-1
This application is licensed to you by its owner.
Microsoft is not responsible for, nor does it grant any licenses to, third-party packages.
Downloading https://get.enterprisedb.com/postgresql/postgresql-16.4-1-windows-x64.exe
  ██████████████████████████████   356 MB /  356 MB
Successfully verified installer hash
Starting package install...
Successfully installed
Where 16 is the major version of PostgreSQL being installed.
This code installs PostgreSQL in unattended mode. (Unattended mode doesn't ask you questions about the components to install, where to install them, or what the initial configuration looks like. However, Windows might prompt you to approve admin access for the installer.) The installer uses the default location (C:\Program Files\PostgreSQL\) with the default password (postgres) and also installs both StackBuilder and pgAdmin.
Tip
You can find a list of available PostgreSQL versions by using WinGet's search command:
winget search PostgreSQL.PostgreSQL
Name          Id                       Version Source
------------------------------------------------------
PostgreSQL 10 PostgreSQL.PostgreSQL.10 10      winget
PostgreSQL 11 PostgreSQL.PostgreSQL.11 11      winget
PostgreSQL 12 PostgreSQL.PostgreSQL.12 12.20-1 winget
PostgreSQL 13 PostgreSQL.PostgreSQL.13 13.16-1 winget
PostgreSQL 14 PostgreSQL.PostgreSQL.14 14.13-1 winget
PostgreSQL 15 PostgreSQL.PostgreSQL.15 15.8-1  winget
PostgreSQL 16 PostgreSQL.PostgreSQL.16 16.4-1  winget
PostgreSQL 9  PostgreSQL.PostgreSQL.9  9       winget
Installers for release candidate versions of PostgreSQL are also available on the EDB website downloads page.
Further reading
For more control over installation (specifying components, location, port, superuser password, and so on), you can also download and run the installer interactively by following the instructions in Installing PostgreSQL on Windows.
Add PostgreSQL commands to your path
PostgreSQL comes with several useful command-line tools for working with your databases. For convenience, you can add their location to your path.
- Open the System Properties control panel and select the Advanced tab, or run
SystemPropertiesAdvanced.exe. - Select Environment Variables to open the environment variables editor.
- Find the
Pathvariable under the System variables heading, and select Edit. - Add the path to the bin directory of the PostgreSQL version you installed, for example,
C:\Program Files\postgresql\16\bin\, where16is the version of PostgreSQL that you installed.
This affects only new command prompts
If you have a command prompt open, close and reopen it to make your changes to the system path take effect.
Verifying your installation
After installing PostgreSQL and adding the commands to your path, a PostgreSQL service will be running with the default database and superuser account. You can verify this by connecting, creating a new user and database, and then connecting using that user.
Connect with psql
Open a new command prompt, and run:
psql -U postgres
Password for user postgres:

psql (16.4)
WARNING: Console code page (437) differs from Windows code page (1252)
         8-bit characters might not work correctly. See psql reference
         page "Notes for Windows users" for details.
Type "help" for help.

postgres=#
When prompted, enter the default password (postgres).
Warning
Because you're setting up an environment for local development and don't intend to enable remote connections or work with sensitive data, leaving the default password is fine. Never leave the default password set on a production or multi-user system.
It's good practice to develop with a user and database other than the default (postgres database and postgres superuser). Doing so allows you to apply the principle of least privilege and helps to avoid issues when you deploy. Since the superuser can modify everything, if you develop as superuser you'll never encounter permissions errors even if your app's configuration has you reading or writing to the wrong table, schema, or database. That's a bug you don't want to ship! Start off right by creating an app user and giving it its own database to operate on:
create user myapp with password 'app-password';
create database appdb with owner myapp;
CREATE ROLE
CREATE DATABASE
Further reading
Now. quit psql and connect with pgAdmin as the new user:
\q
Connect with pgAdmin
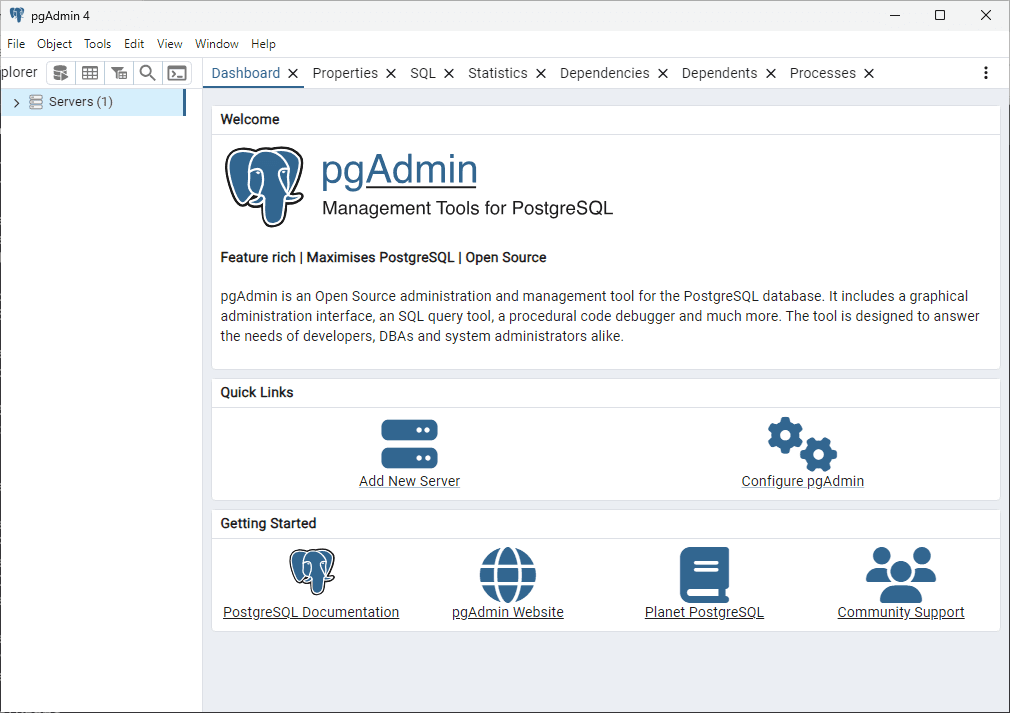
Launch pgAdmin using the Start menu. You can find it under PostgreSQL 16, or just type pgAdmin.

If you poke around a bit (by expanding the Servers group on the left), you'll see that pgAdmin comes with a default connection configured for the postgres user to the postgres database in the local PostgreSQL server.
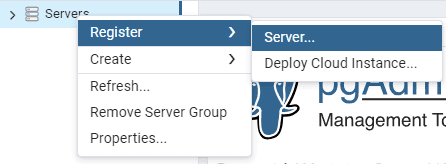
Add a connection for the app user to the app database.
Right-click the Servers entry on the left, and select Register > Server.

On the General tab, give the server a descriptive name, like
myapp db.On the Connection tab, enter connection information, using the new role and database you created in psql earlier:
localhostfor Host name/addressappdbfor Maintenance databasemyappfor Usernameapp-passwordfor Password
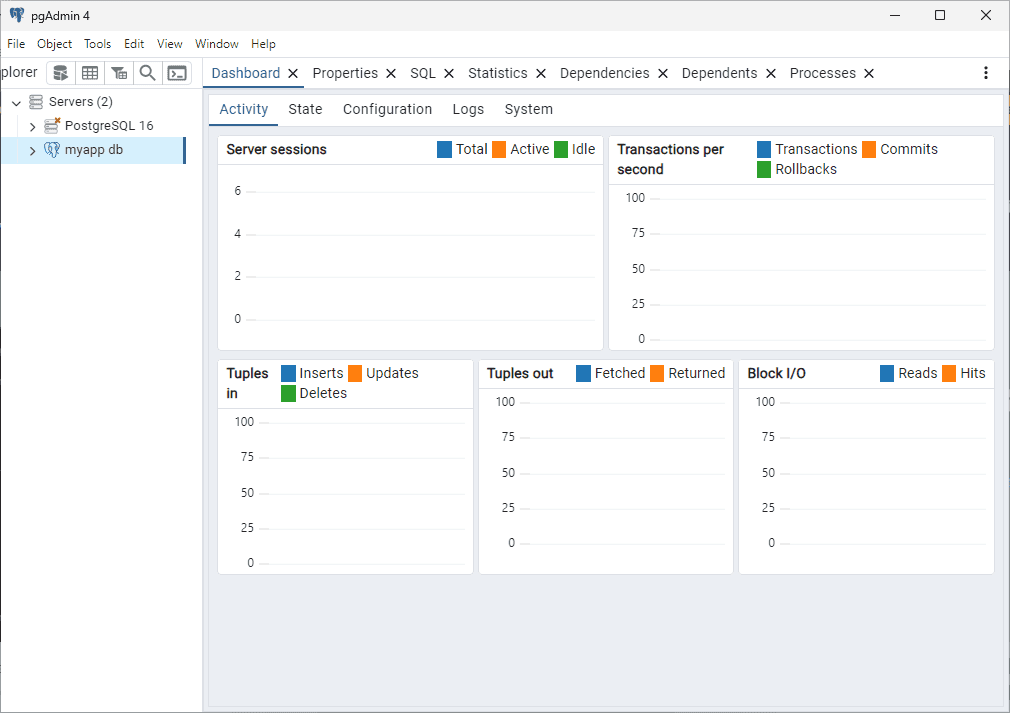
Select the Save password? option and select Save.

Because you're not connected as a superuser, some areas that require system-level permissions, such as logs, are unavailable. For these, you can use the default superuser connection.
Conclusion
By following these steps, you've created a local environment for developing against PostgreSQL. You've created your own database and limited-access user to own it and can proceed to create a schema, connect application frameworks, run tests, and so on.
← Prev
Installing PostgreSQL in a Docker container on your local machine
↑ Up
Deploying Postgres for developers
Next →
Working with Postgres tools - guides for developers
Could this page be better? Report a problem or suggest an addition!