pgAdmin can be deployed as a web application by configuring the app to run in server mode. One can check out server deployment on how to run pgAdmin in server mode. In this blog, we will discuss how to manage the pgAdmin users when running in server mode.
Authentication Sources
In general, pgAdmin has two types of authentication - Internal and External
- The internal users are directly managed by the pgAdmin administrator and are authenticated using pgAdmin itself.
- External users are the ones who access pgAdmin using an external authentication mechanism like OAuth2, LDAP, web server, etc. Users will have authentication source type based on the mechanism used.
User Management Dialog
If you install pgAdmin in server mode, you will be prompted for an administrator email and password to access pgAdmin. The admin can manage the pgAdmin users using the user management dialog. To access user management:
- Login to pgAdmin with admin user.
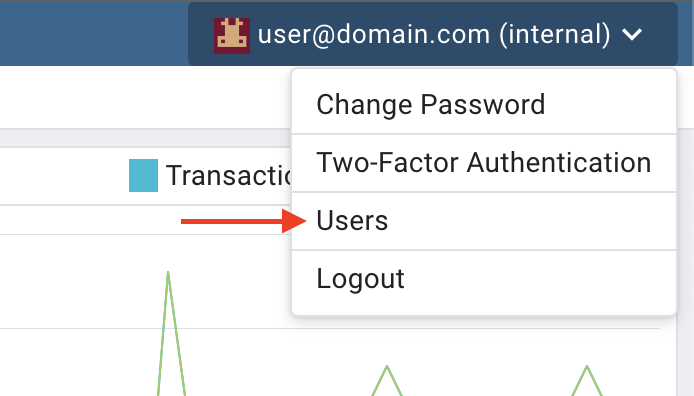
- Click on the user button on the top-right corner of pgAdmin.
- Select the option - Users.

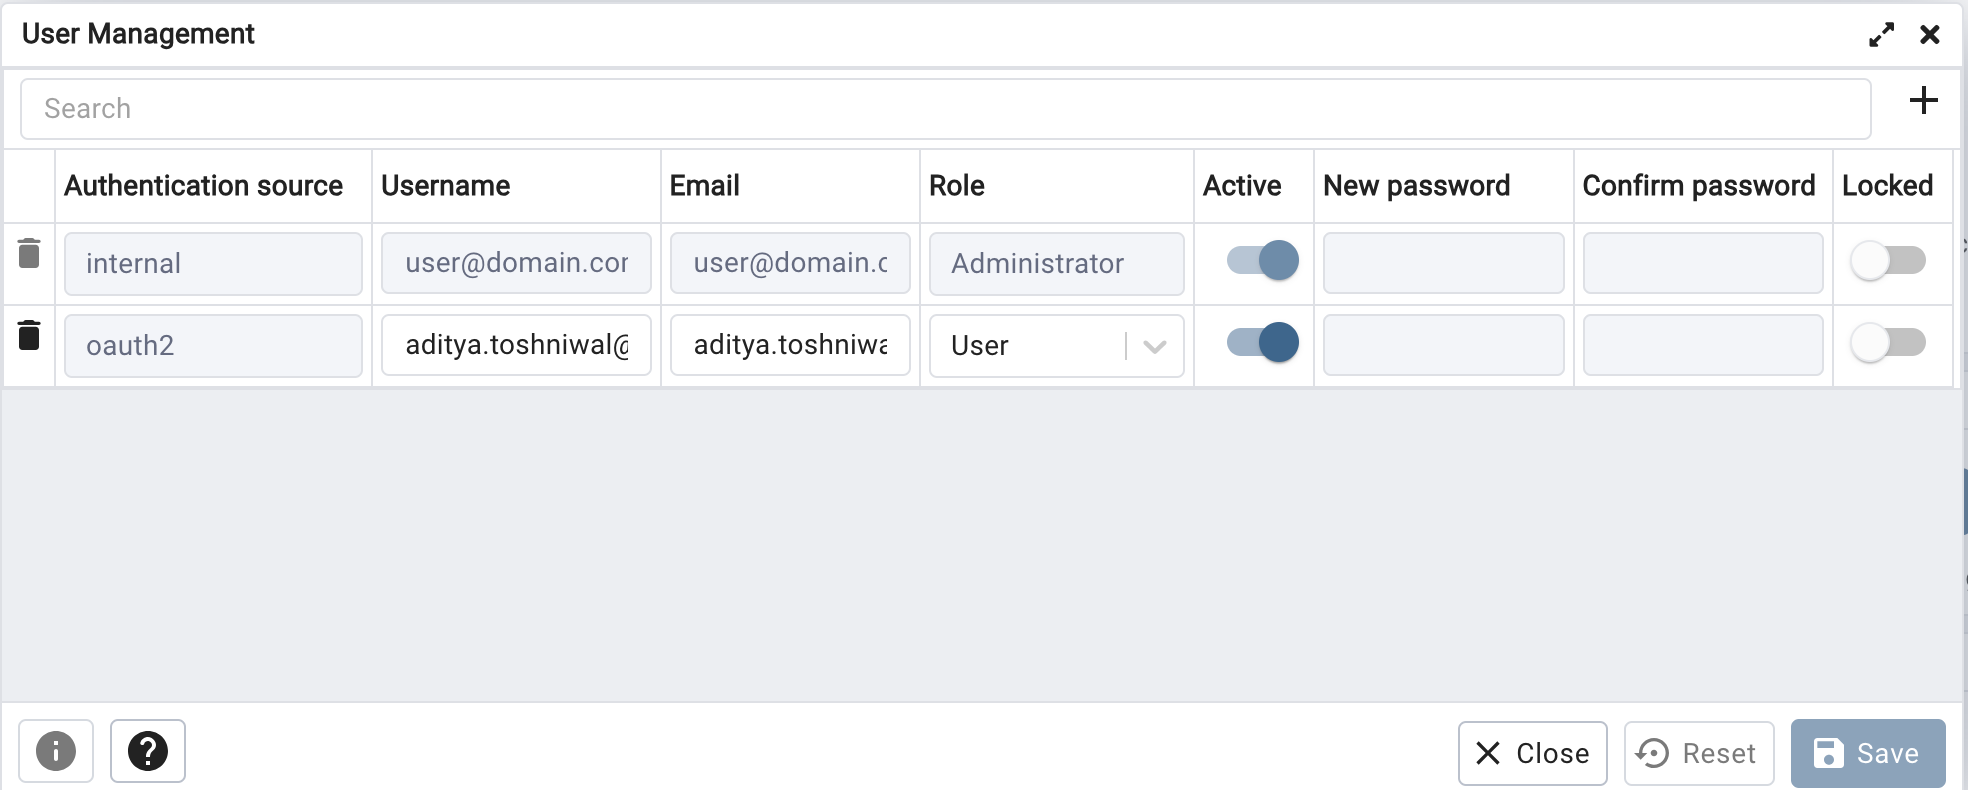
This will open the user management dialog as shown below.

The dialog lists all the users in pgAdmin. Administrators can add an internal user directly by clicking on the “+” add button and filling in the required details. The authentication source value will be internal for such users.
When an internal user attempts to login to pgAdmin with an incorrect password and reaches a maximum limit of retries then the user will be locked and cannot login until an administrator unlock the user. The locked column switch indicates the same.
When using external authentication, the users are created automatically upon first login. This is required for various operations of pgAdmin like storing the registered server against the user, creating a user storage space on the server, etc. External accounts can be easily identified using the authentication source column. Administrators can delete such users, which will eventually clean up everything in pgAdmin related to that user.
In the case of external authentication, the pgAdmin server administrator can disable the user auto-creation by setting the <METHOD>_AUTO_CREATE_USER config parameter to False. The available configurations are LDAP_AUTO_CREATE_USER, KRB_AUTO_CREATE_USER, OAUTH2_AUTO_CREATE_USER and WEBSERVER_AUTO_CREATE_USER for LDAP, Kerberos, OAuth2 and webserver authentication respectively. In that case, administrators need to manually add the users using the User Management dialog, and only those which are added will be allowed to login.
Administrators can decide to mark a user as inactive using the active column switch. Users will not be able to login until it is marked active again..
To know more about the user management dialog in detail, checkout the pgAdmin docs.
Conclusion
pgAdmin administrators can manage all the users and perform all the operations using a single dialog. Currently, users can be managed using the UI only. The pgAdmin team is working on providing certain functionalities using the command line interface. It will help administrators to automate user management.
The pgAdmin team welcomes any suggestions or improvements that can be made. To log a request please visit https://github.com/pgadmin-org/pgadmin4/issues/new.
