pgAdmin 4 supports multiple authentication methods through its pluggable architecture.
Currently four methods are supported:
- Password based pgAdmin internal authentication (default)
- Kerberos
- LDAP
- OAuth 2.0
We are also going to support authentication at web server level, ex: HTTP Basic Auth very soon, keep an eye on the pgAdmin release notes for more information.
This blog will guide you to set up the OAuth 2.0 authentication in pgAdmin 4.
OAuth 2.0
The OAuth 2.0 authorization framework enables a third-party application to obtain limited access to an HTTP service, either on behalf of a resource owner by orchestrating an approval interaction between the resource owner and the HTTP service, or by allowing the third-party application to obtain access on its own behalf.
Source
pgAdmin works as an OAuth 2.0 client and throughout the guide, we will take Github and Google as examples of OAuth 2.0 providers/servers.
Configure pgAdmin 4 for OAuth 2.0
To enable the OAuth 2.0 authentication, configure the settings in the config_local.py or config_system.py file (see the config.py documentation) on the system where pgAdmin is installed in Server mode.
config_local.py/config_system.py
The first parameter, which enables the OAuth 2.0 is AUTHENTCATION_SOURCES.
Set AUTHENTCATION_SOURCES = [‘oauth2’]
OAuth 2.0 provider settings
In order to set the OAuth 2.0 provider/server, set the following parameters.
OAUTH2_NAME: The name of the OAuth 2.0 provider, ex: Google, Github
OAUTH2_CLIENT_ID: OAuth 2.0 Client ID
OAUTH2_CLIENT_SECRET: OAuth 2.0 Client Secret
OAUTH2_TOKEN_URL: OAuth 2.0 Access Token endpoint
OAUTH2_AUTHORIZATION_URL: Endpoint for user authorization
OAUTH2_API_BASE_URL: OAuth 2.0 base URL endpoint to make requests simple, example.
OAUTH2_USERINFO_ENDPOINT: User Endpoint, ex: user (for github) and useinfo (for google)
OAUTH2_SCOPE: The Scope is a mechanism in OAuth 2.0 to limit an application's access to a user's account. Example scopes are openid, email, profile. You can add multiple scopes by space separated.
OAuth 2.0 settings for the login button
You can also customize the OAuth 2 login button to tune with the service provider. Set the following parameters to customize it.
OAUTH2_DISPLAY_NAME: OAuth 2 display name
OAUTH2_ICON: The Font-awesome icon to be placed on the login button, ex: fa-github
OAUTH2_BUTTON_COLOR: Button color ex: #0000FF
OAuth 2.0 auto create user
Last but not the least, the OAUTH2_AUTO_CREATE_USER parameter will be useful to determine whether the end user should be stored in the pgAdmin database for the future login or not. If it is set to False, the corresponding user must be created by pgAdmin admin otherwise login will be denied.
OAUTH2_AUTO_CREATE_USER: True
Sample code snippet
Here is an example of the config settings. pgAdmin 4 supports multiple providers simultaneously, to do so check the below example.
AUTHENTICATION_SOURCES = ['oauth2']
OAUTH2_AUTO_CREATE_USER = True
OAUTH2_CONFIG = [{
    'OAUTH2_NAME': 'github',
    'OAUTH2_DISPLAY_NAME': 'Github',
    'OAUTH2_CLIENT_ID': xxxxxxxxxx,
    'OAUTH2_CLIENT_SECRET': xxxxxxxxxxxx,
    'OAUTH2_TOKEN_URL': 'https://github.com/login/oauth/access_token',
    'OAUTH2_AUTHORIZATION_URL': 'https://github.com/login/oauth/authorize',
    'OAUTH2_API_BASE_URL': 'https://api.github.com/',
    'OAUTH2_USERINFO_ENDPOINT': 'user',
    'OAUTH2_ICON': 'fa-github',
    'OAUTH2_BUTTON_COLOR': '#3253a8',
},{
    'OAUTH2_NAME': 'google',
    'OAUTH2_DISPLAY_NAME': 'Google',
    'OAUTH2_CLIENT_ID':xxxxxxxxxx,
    'OAUTH2_CLIENT_SECRET': xxxxxxxxxxxx,
    'OAUTH2_TOKEN_URL': 'https://oauth2.googleapis.com/token',
    'OAUTH2_AUTHORIZATION_URL': 'https://accounts.google.com/o/oauth2/auth',
    'OAUTH2_API_BASE_URL': 'https://openidconnect.googleapis.com/v1/',
    'OAUTH2_USERINFO_ENDPOINT': 'userinfo',
    'OAUTH2_ICON': 'fa-google',
    'OAUTH2_BUTTON_COLOR': '#3253a8',
    'OAUTH2_SCOPE': 'openid email profile',
}]
Redirect URL
While configuring the OAuth 2.0 server/provider for the pgAdmin or any third party application, you need to provide the redirect url, so that; once the authentication process is completed, the end user will be redirected to the application.
The redirect url to configure OAuth 2.0 server is:
http://<pgAdmin Server URL>/oauth2/authorize
pgAdmin login
Here is the login page after the successful configuration. You can see how multiple OAuth 2 buttons would be displayed on the login screen.

Authorization page
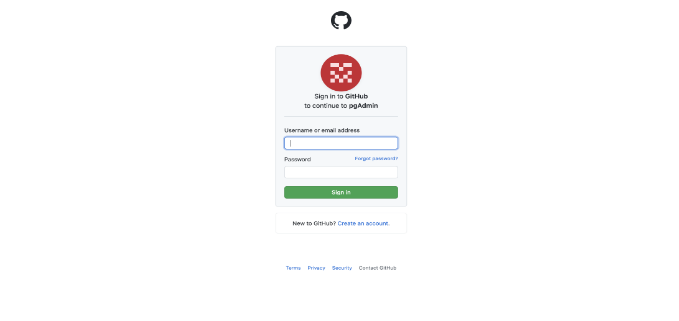
When a user clicks on the OAuth 2 login button, the user will be redirected to the respected provider’s authentication page, in this case Github. The user needs to provide the credentials, so the OAuth provider can send the authorization token to the pgAdmin and pgAdmin can further request the user data to complete the login process.

Successful login
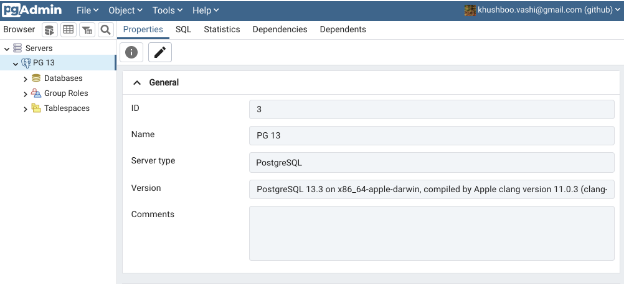
After successful authentication, the user will be able to use the pgAdmin 4. At the top right corner, you can see the username with the OAuth service provider name.

Now, you should be able to configure the OAuth 2.0 in the pgAdmin 4 to authenticate the users. For any queries or further assistance, write to us at pgadmin-support@lists.postgresql.org.
