pgAdmin 4 supports multiple authentication methods through its pluggable architecture.
In addition to the four existing authentication methods; Kerberos, LDAP, OAuth 2.0, and internal, pgAdmin4 now supports webserver authentication.
Web server authentication (HTTP authentication) is the most common application of third-party authentication. With web server authentication, the web server performs the authentication and the application trusts the web server.
To enable web server authentication, the web server must be configured for any authentication mechanism (such as HTTP Basic auth or Shibboleth) which sets either headers or environment variables which will be used in pgAdmin to identify the user.
This blog will guide you to set up the apache2 webserver authentication with HTTP BASIC auth in pgAdmin 4, on Debian or Ubuntu Linux. The process is the same on other Linux distributions, but file, directory, and service names may differ.
Configure pgAdmin 4 for Apache2 Password Authentication
To enable web server authentication for pgAdmin, you must configure the settings below in the config_local.py or config_system.py file (see the config.py documentation) on the system where pgAdmin is installed in Server mode.
AUTHENTICATION_SOURCES
To enable web server authentication support, you need to add ‘webserver’ in the list.
WEBSERVER_REMOTE_USER
Set this variable to any header or environment variable to get the webserver remote user details. Common values: REMOTE_USER, HTTP_X_FORWARDED_USER, X-Forwarded-User.
WEBSERVER_AUTO_CREATE_USER
This parameter determines whether the end user should be stored in the pgAdmin database for the future login or not. If it is set to False, the corresponding user must be created by pgAdmin admin otherwise login will be denied.
After editing above parameters, config_system.py will look as below:
# Webserver Authentication

AUTHENTICATION_SOURCES = ['webserver', 'internal']

WEBSERVER_REMOTE_USER = 'REMOTE_USER'

WEBSERVER_AUTO_CREATE_USER = True
Configuring Apache Password Authentication
Create the Password File
We will create a file for this purpose called htpasswd within our /etc/apache2 configuration directory. You will be asked to supply and confirm a password for the user.
sudo htpasswd -c /etc/apache2/htpasswd pgadmin_user1
Leave out the -c argument for any additional users to add.
sudo htpasswd /etc/apache2/htpasswd pgadmin_user2
You may want to change the permissions to secure a password file.
chmod 400 /etc/apache2/htpasswd
chown www-data /etc/apache2/htpasswd
Configuring Access Control within the apache2 conf
To enable web server authentication with apache2, the directives below are required to be set:
AuthType - ‘Basic’.
AuthName - Message will be displayed to the user when prompting for credentials.
AuthUserFile - To point Apache to the password file.
Require - Equal to ‘valid-user’ which means anyone who can verify their identity with a password will be allowed in.
Here is a code snippet for pgadmin4.conf which is running behind apache2 server under the directory /etc/apache2/conf-available/.
WSGIDaemonProcess pgadmin processes=1 threads=25 python-home=/usr/pgadmin4/venv
WSGIScriptAlias /pgadmin4 /usr/pgadmin4/web/pgAdmin4.wsgi

<Directory /usr/pgadmin4/web/>
    WSGIProcessGroup pgadmin
    WSGIApplicationGroup %{GLOBAL}
    AuthType Basic
    AuthName "Restricted Content"
    AuthUserFile /etc/apache2/htpasswd
    Require valid-user
</Directory>
Save and close the file. Restart Apache to implement your password policy:
sudo service apache2 restart
Confirm the Password Authentication
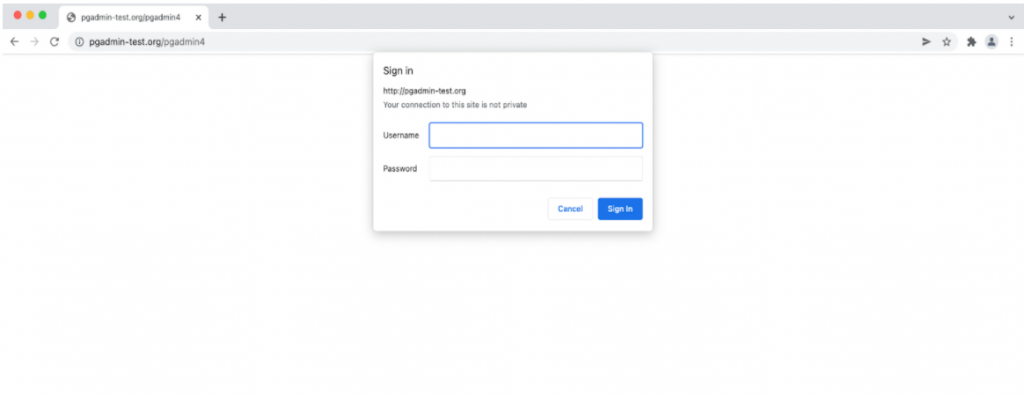
To confirm that your content is protected, try to access your restricted content in a web browser. You should be presented with a username and password prompt that looks like this:

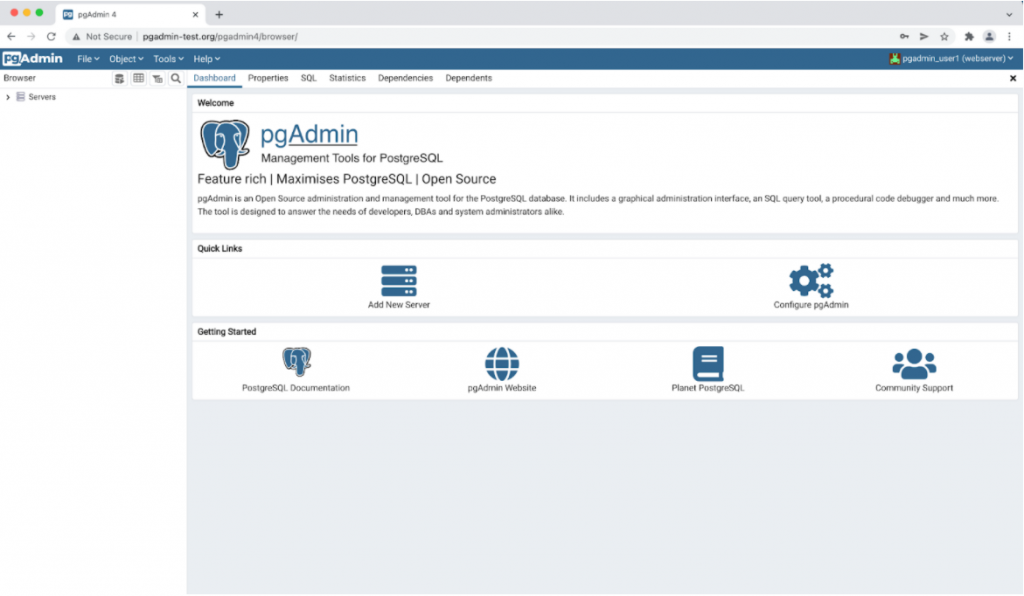
Entering the correct username & password created previously will allow access to pgAdmin.

Conclusion
You should now have everything you need to set up basic authentication for pgAdmin4. For any queries or further assistance, write to us at pgadmin-support@lists.postgresql.org.
Read more: How to Use Logical Replication in pgAdmin4
