My top #1 open source tool that I have discovered in the last year is definitely Vagrant. Vagrant is a software that helps you build and configure virtual environments for development and testing purposes. Vagrant relies on virtual machine providers such as VirtualBox, VMWare and AWS, as well as provisioning tools such as Chef and Puppet, allowing developers to clearly define their boxes using text files (which then can be easily versioned).
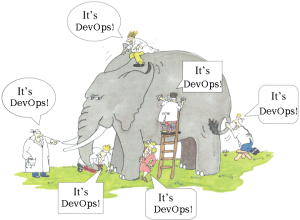
If you have devops concepts in mind, you easily understand how important this is. If not, I encourage you to read about the devops movement (written with lowercase letters as my friend Frédéric Descamps from Percona pointed out to me recently – emphasising the cooperation between developers and administrators).
The goal of this blog post (which is split into two parts) is to show how easy it is to setup a Linux virtual machine running PostgreSQL on your physical computer using Vagrant and VirtualBox. The cool thing is that Vagrant runs on Windows, Mac and Linux and you can use the same configuration files. In this article, I have used Vagrant on Ubuntu 12.04 LTS (64 bits).
The first part of the article will cover Vagrant setup and will guide you through starting up a CentOS 6 Linux server on your computer.
The second part will then show how to provide a virtual machine with PostgreSQL 9.3 installed. We will use Puppet as a provisioner, with librarian-puppet to help us fetch Puppet modules from the Internet.
Installing Virtual Box
The first step is to download VirtualBox from their website. Select the right file for your operating system and architecture, and download it. On my Ubuntu I typed:
wget "http://download.virtualbox.org/virtualbox/4.2.18/virtualbox-4.2_4.2.18-88780~Ubuntu~precise_amd64.deb"I then installed it using dpkg:
sudo dpkg -i virtualbox-*.debIn order to make the vboxdrv Linux kernel module work, you need to install DKMS:
sudo apt-get install dkmsJust to give an example to users of different environments, on CentOS 6 (64 bit) I could have done the same operation with the following command:
sudo yum install dkms \
"http://download.virtualbox.org/virtualbox/4.2.18/VirtualBox-4.2-4.2.18_88780_el6-1.x86_64.rpm"
Installing Vagrant
This step is pretty straightforward. Go to the download page of Vagrant, pick the latest version and select the package for your system. In my case, I picked up the Debian package:
wget http://files.vagrantup.com/packages/db8e7a9c79b23264da129f55cf8569167fc22415/vagrant_1.3.3_x86_64.debThen install it:
sudo dpkg -i vagrant_*.debDownload a Vagrant box
Now that both VirtualBox and Vagrant are installed on your physical computer, it is time to browse the list of available boxes for Vagrant. A base box is a template of a virtual machine. For example, you can select a minimal CentOS 6 box and use it to run PostgreSQL on it. This is what I will do here:
vagrant box add centos6-64 http://puppet-vagrant-boxes.puppetlabs.com/centos-64-x64-vbox4210.boxThis operation will take a while, as it needs to download over 400MB of data. However, it is a one-off operation. After this, you will have a local copy of the box inside your ~/.vagrant.d/boxes directory.
Testing a bare bone machine
We are ready to go. The first step is to test that we are effectively capable of running the box that we have just downloaded. Create a directory for your test project and enter it. Then type:
vagrant init centos6-64You will get something similar to:
A `Vagrantfile` has been placed in this directory. You are now
ready to `vagrant up` your first virtual environment! Please read
the comments in the Vagrantfile as well as documentation on
`vagrantup.com` for more information on using Vagrant.
Take some time to go through that file, then type:
vagrant upVagrant will start up a virtual machine using the centos6-64 base box, as follows:
Bringing machine 'default' up with 'virtualbox' provider...
[default] Importing base box 'centos6-64'...
[default] Matching MAC address for NAT networking...
[default] Setting the name of the VM...
[default] Clearing any previously set forwarded ports...
[default] Fixed port collision for 22 => 2222. Now on port 2200.
[default] Creating shared folders metadata...
[default] Clearing any previously set network interfaces...
[default] Preparing network interfaces based on configuration...
[default] Forwarding ports...
[default] -- 22 => 2200 (adapter 1)
[default] Booting VM...
[default] Waiting for machine to boot. This may take a few minutes...
[default] Machine booted and ready!
[default] Mounting shared folders...
[default] -- /vagrant
It is now time to try and connect to the server. Vagrant gives you the vagrant ssh command as a shortcut:
vagrant ssh

Welcome to your Vagrant-built virtual machine.
[vagrant@localhost ~]$
You are now connected as vagrant user, which has proper sudo capabilities.
An important command to be aware of is: vagrant status. If you execute it, you will get a similar message:
Current machine states:

default                   running (virtualbox)

The VM is running. To stop this VM, you can run `vagrant halt` to
shut it down forcefully, or you can run `vagrant suspend` to simply
suspend the virtual machine. In either case, to restart it again,
simply run `vagrant up`.
Conclusions
I have shown you how easy it is to setup a local virtual environment with Vagrant. You can play with it. Or even destroy it (yes, vagrant destroy is the way to go).
I strongly suggest that you spend some time browsing through the Vagrant documentation and try and modify the Vagrantfile. The documentation is extremely accurate and very clear.
If you prefer, you can buy the “Vagrant: Up and Running” book, written Mitchell Hashimoto, the author of Vagrant.
Next time, we will be writing our Puppetfile and make sure that PostgreSQL 9.3 will be up and running on it!
