1. Introduction
Logical replication uses a publish/subscribe model and so we create publications on the upstream (or publisher) and subscriptions on downstream (or subscriber). For more details about it, please refer to this blog post from my colleague Petr Jelinek, and also to the PostgreSQL documentation.
Here we will show how to build a test environment to play with this new feature from PostgreSQL 10, and how to configure it using OmniDB 2.1.
2. Building test environment
Let’s build a 2-node test environment to illustrate how to configure PG10 logical replication feature within OmniDB.
2.1. Pull OmniDB repo
The first thing you need to do is to download OmniDB in the repo from GitHub and make sure you are in the development branch. Run the following:
2.2. Create 2 virtual machines with PostgreSQL 10
On your host machine, you need to have installed:
- VirtualBox
- Vagrant
- Vagrant plugin vbguest
Please refer to the VirtualBox and Vagrant websites for more information.
For this test environment to work, you need to put both machines in the same internal network. If necessary, please edit the file Vagrantfile for both machines like this:
config.vm.network "private_network", ip: '192.168.56.101', :name => 'vboxnet0', :adapter => 2cd OmniDB/OmniDB_app/tests/vagrant/multinode/pg10_node1
vagrant upvagrant ssh. User vagrant has root access with sudo su. Now let’s create the second virtual machine with PostgreSQL 10:cd ../pg10_node2
vagrant upomnidb.3. Configuring logical replication
3.1. Set PostgreSQL parameter “wal_level”
You need to connect to each machine and set wal_level = logical. For the first machine, assuming you are on the root folder of OmniDB:
user@host:~$ vagrant ssh
vagrant@omnidb1:~$ sudo su
root@omnidb1:/home/vagrant# echo "wal_level = logical" >> /etc/postgresql/10/main/postgresql.conf
root@omnidb1:/home/vagrant# systemctl restart postgresql3.2. Use OmniDB to connect to both machines
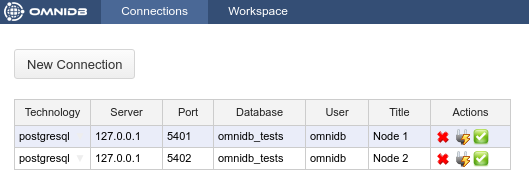
Assuming you have OmniDB (server or app) installed in your host machine, you can connect to both databases in order to test the connection. In OmniDB, create 2 connections like this:
Then click on the Test Connection action on each connection. You will have to type the password of the user omnidb, which is also omnidb.
3.3. Create a test table on both machines
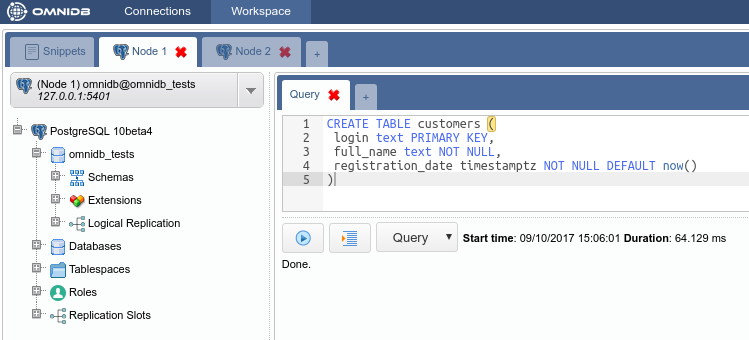
Connect to both databases and create a test table, like this:
CREATE TABLE customers (
full_name text NOT NULL,
registration_date timestamptz NOT NULL DEFAULT now()
)3.4. Create a publication on the first machine
Inside the connection node, expand the Logical Replication node, then right click in the Publications node, and choose the action Create Publication. OmniDB will open an SQL template tab with the CREATE PUBLICATION command ready for you to make some adjustments and run:
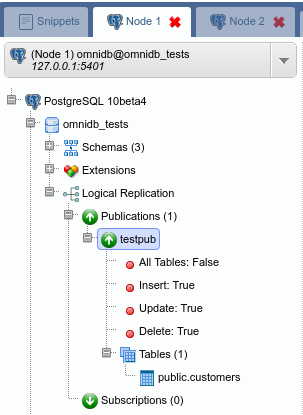
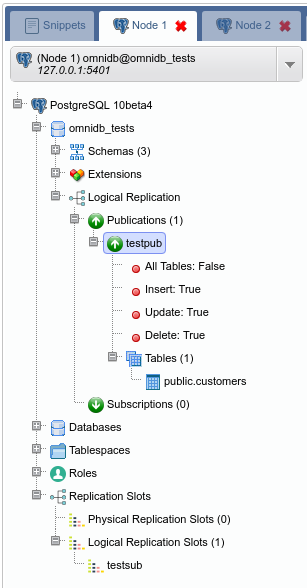
After adjusting and executing the command, you can right click the Publications node again and click on the Refresh action. You will see that will be created a new node with the same name you gave to the publication. Expanding this node, you will see the details and the tables for the publication:
3.5. Create a subscription on the second machine
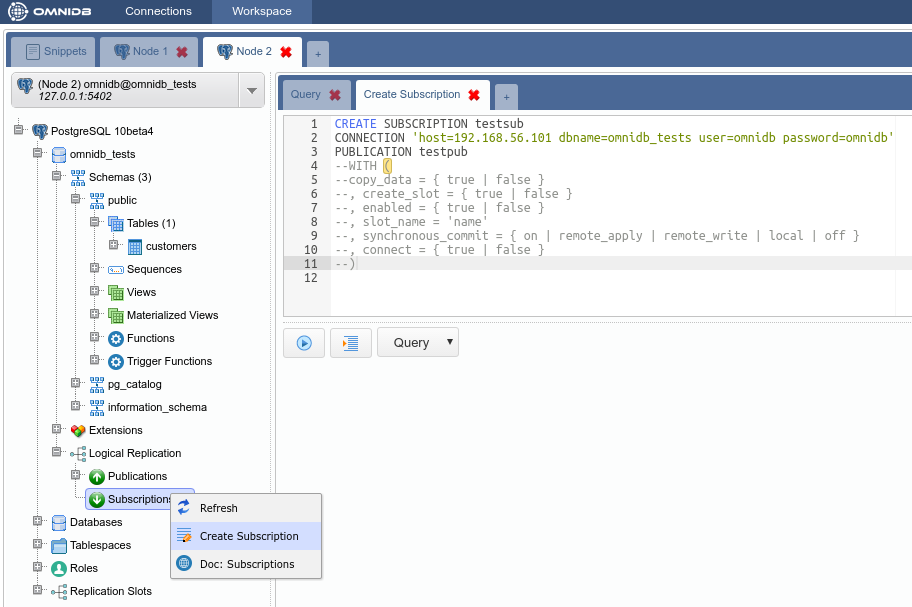
Inside the connection node, expand the Logical Replication node, then right click in the Subscriptions node, and choose the action Create Subscription. OmniDB will open a SQL template tab with the CREATE SUBSCRIPTION command ready for you to make some adjustments and run:
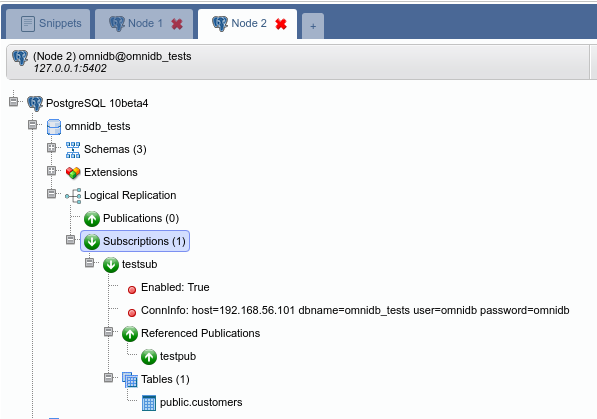
After adjusting and executing the command, you can right click the Subscriptions node again and click on the Refresh action. You will see that will be created a new node with the same name you gave to the subscription. Expanding this node, you will see the details, the referenced publications and the tables for the subscription:
Also, the CREATE SUBSCRIPTION command created a logical replication slot called testsub (the same name as the subscription) in the first machine:
4. Testing the logical replication
So far we’ve created:
- Table
public.customerson both nodes 1 and 2 - Publication
testpubfor tablepublic.customerson node 1 - Subscription
testsubon node 2, referencing publicationtestpub
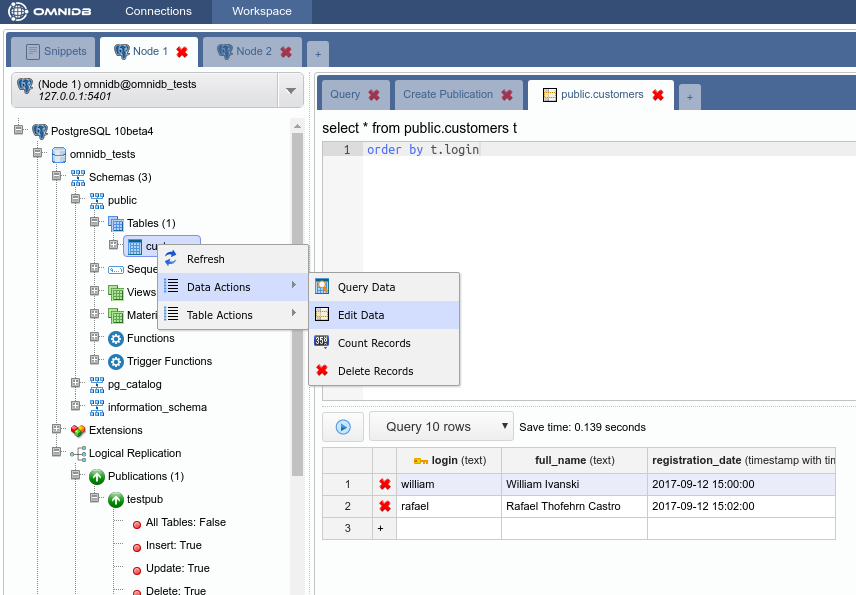
To test the replication is working, let’s create some data on the node 1. Right click on the table public.customers, then point to Data Actions, then click on the action Edit Data. In this grid, you are able to add, edit and remove data from the table. Add 2 sample rows, like this:
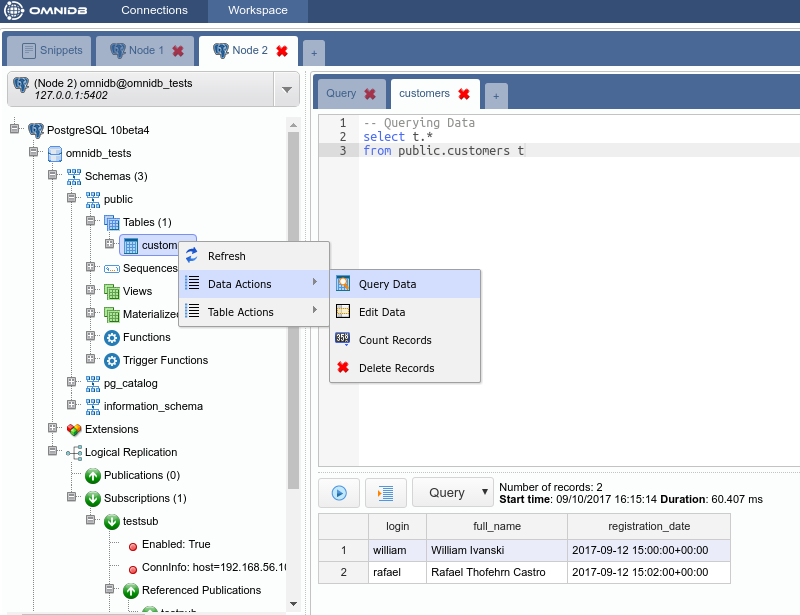
Then, on the other node, check if the table public.customers was automatically populated. Right click on the table public.customers, then point to Data Actions, then click on the action Query Data:
As we can see, both rows created in the first machine were replicated into the second machine. This tells us that the logical replication is working. And it was configured using the OmniDB web interface.
4. More features
Right clicking on the publication or the subscription, which shows Alter and Drop actions, you can use to change and remove publications and subscriptions.
You can also add and remove tables from a publication:

