Nowadays, organizations of every size, type, and industry are using cloud for a wide variety of use-cases. EDB recently announced its own cloud service, BigAnimal.
BigAnimal is a fully managed database-as-a-service with built-in Oracle compatibility, running in your cloud account and operated by the Postgres experts. So, to deploy the PostgreSQL or EnterpriseDB Advanced Server into Biganimal, pgAdmin recently added support for it.
Through pgAdmin you can easily deploy PostgreSQL or EDB Advanced Server into the cloud, connect it and manage it in a few simple steps.
In this blog, I will walk through the steps to deploy the database instance into the EDB BigAnimal cloud.
To open the Cloud Deployment wizard, first select on any server or server group, right click to get the context menu and then Choose Register > Deploy Cloud Instance.
The cloud deployment wizard is divided into 5 steps as listed below.
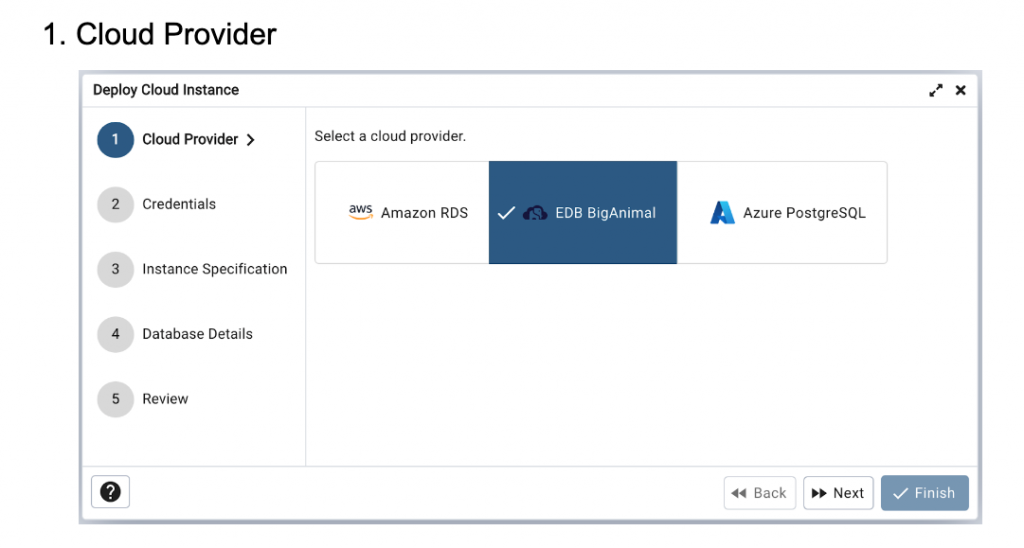
Currently there are 3 cloud providers that are supported, EDB BigAnimal, Amazon RDS and Azure PostgreSQL. Select EDB BigAnimal and click on the next button, to go to the second step.
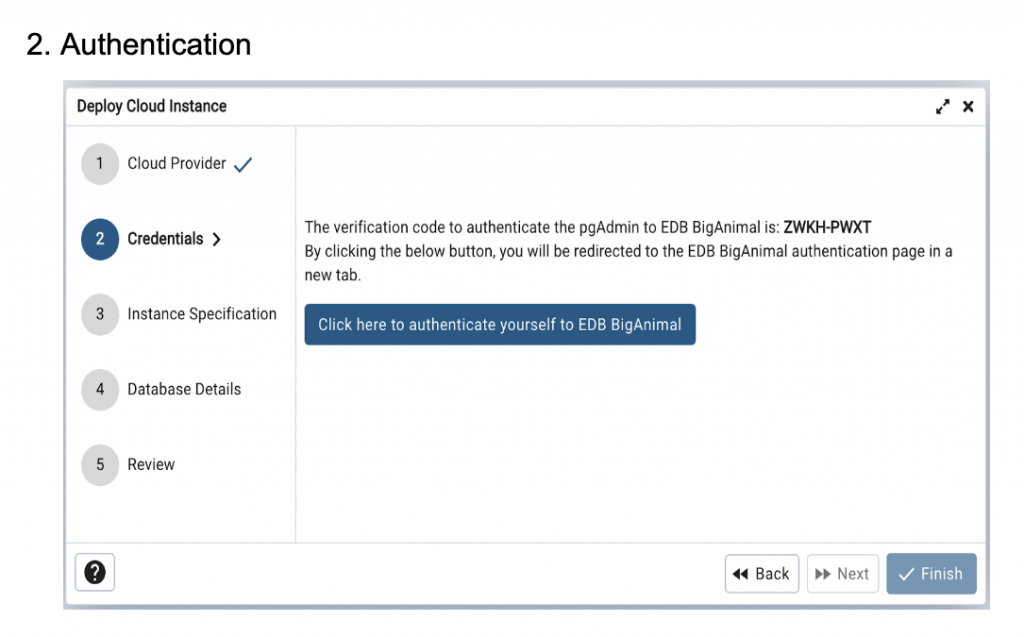
The second step is to authenticate yourself to EDB BigAnimal. You need a EDB BigAnimal account as a prerequisite. On this step, you will see the verification code and the button to authenticate yourself. Once you click the button to verify, you will be redirected to the BigAnimal website. Verify the code displayed on the wizard page matches the one displayed on the BigAnimal verification page and complete the authentication process. Once the authentication is done on the BigAnimal website, come back to pgAdmin. Here you will see the authentication success message and the next button will be enabled.
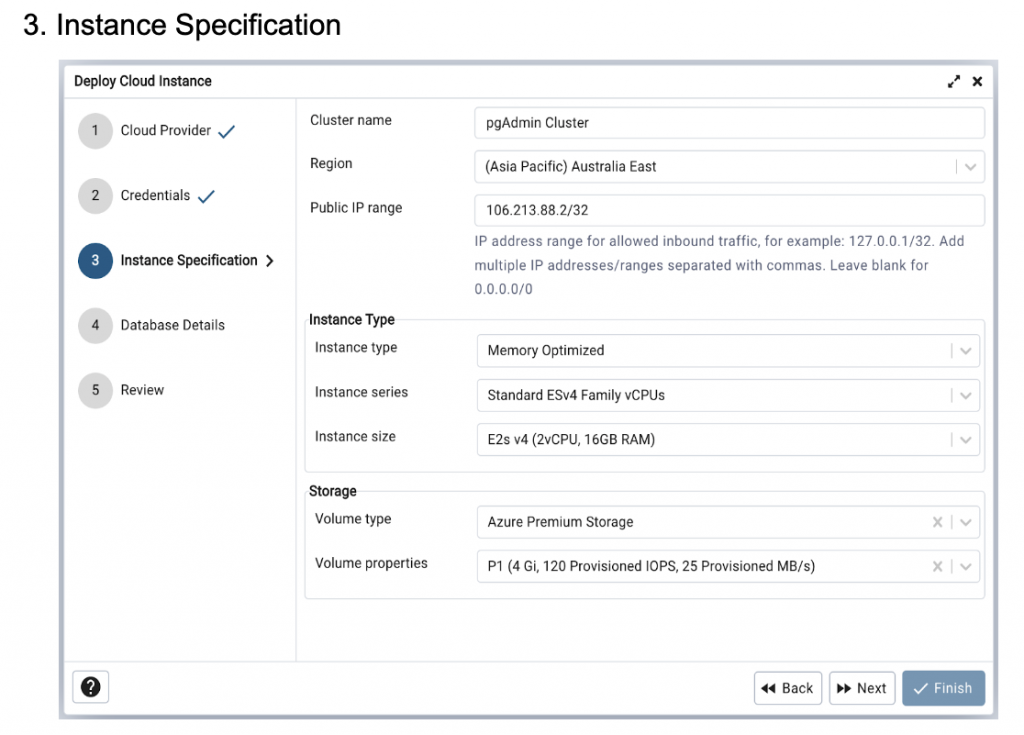
The third step is for the Instance Specification. Provide the details to create a new cluster in the cloud.
Cluster name: Provide the Cluster name
Region: Select the region in which you want to create a cluster.
Public IP range: IP Address range for permitted inbound traffic. Eg: 123.321.12.3/32, add multiple ip addresses/ranges separated by commas.
Instance type: Choose instance type, series and size depending as per your requirements.
Storage: Select volume type and properties as per your requirements.
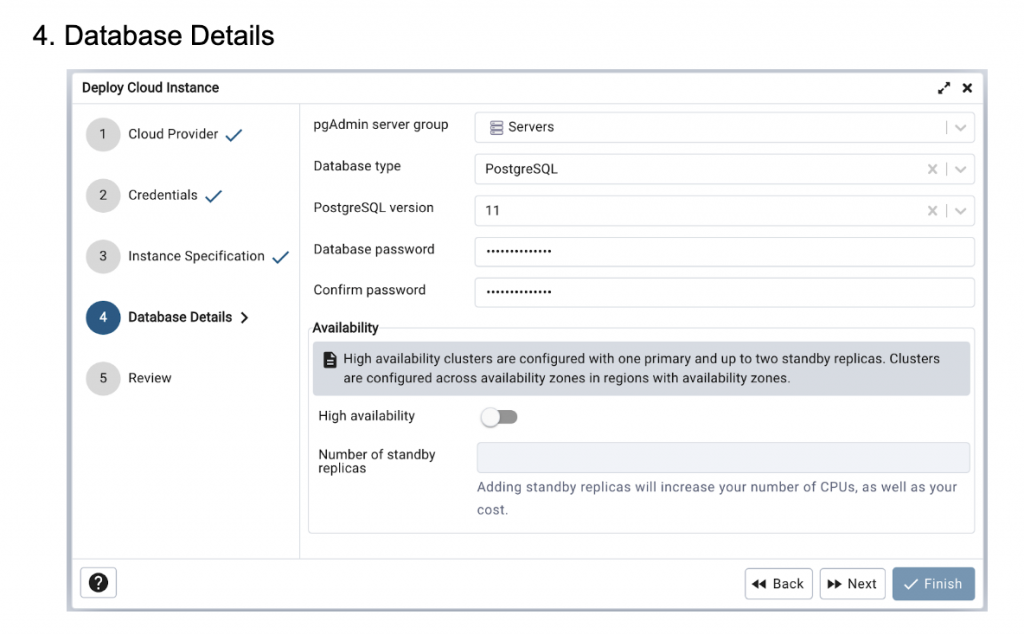
In this step, provide the database details.
pgAdmin server group: Select the server group in pgAdmin, in which the newly created server will be added.
Database type: Select any options from the available list i.e. Postgres, Postgres compatible and Oracle compatible.
PostgreSQL version: Select the database version and provide the password.
Database password: Provide the database password.
Confirm password: Confirm the database password.
Availability: If you enable this option, you need to provide the number of standby replicas allowing high availability clusters to be configured with one primary and the number of standby replicas requested, with synchronous streaming replication.
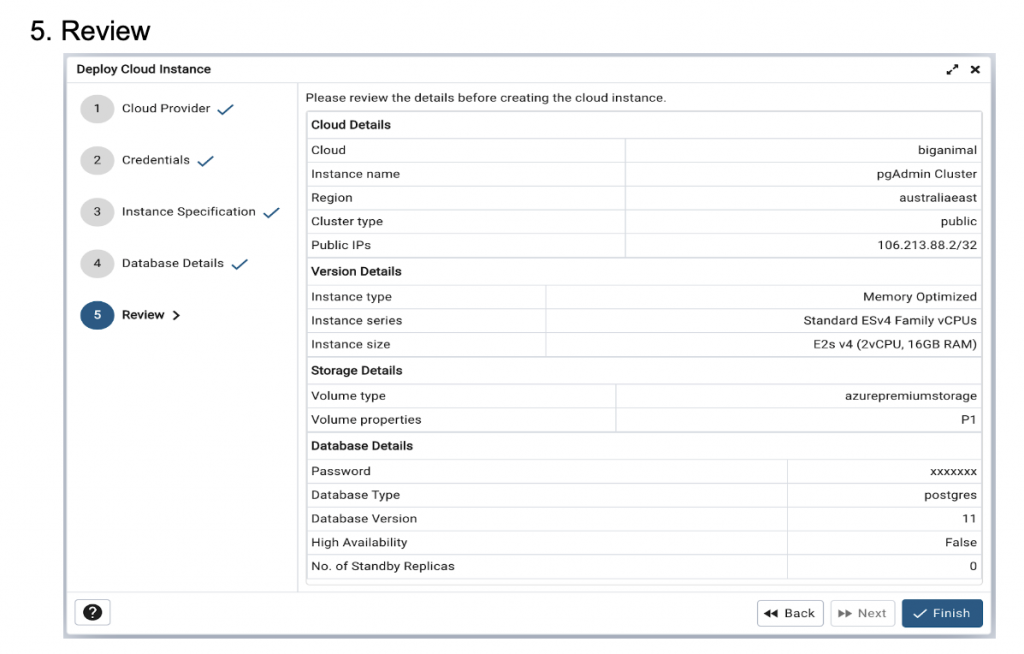
In the last step, review all the inputs you have given and click Finish to create a PostgreSQL instance in the EDB BigAnimal cloud.
On clicking the Finish button, a background process will be created to monitor the progress of the cloud deployment and the server will be added to the left hand side browser tree under the server group you have selected.

Observe the icon of the server in the tree, which indicates deployment is in progress. Meanwhile you can also check the deployment progress through the BigAnimal portal at https://portal.biganimal.com.
On successful deployment, the icon will be reset to the default pgAdmin server icon.
Conclusion
After the successful deployment, you can easily connect to the PostgreSQL instance deployed in the BigAnimal cloud through pgAdmin, and work on it in the same way as other servers.
